modular clean room

OEM Cleanroom Install In One Hour!

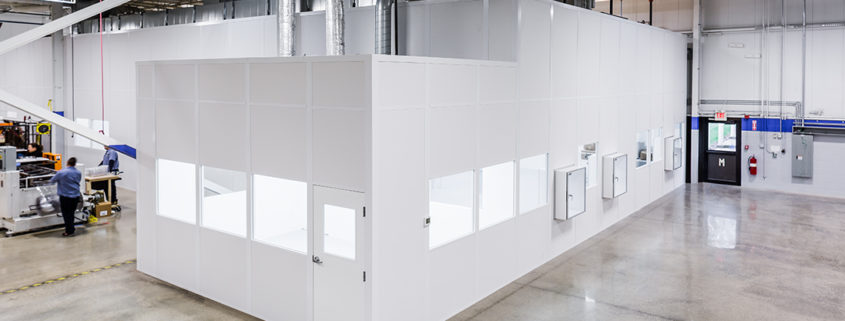
Recently, we met one of our OEM’s at one of their customer’s facilities where they had just built a cleanroom. This was for a pharmacy with an eight bed clinic in a small town in West Virginia. They were just finishing up construction of the room and began installation of the TV2 Monitor for cleanrooms (positive pressure rooms). The installation included the Quick check touchscreen monitor, one temperature/humidity sensor and two differential pressure sensors.

The small cleanroom consisted of one small ante (gowning ) room and the work room, which was divided into two areas separated by a polycarbonate divider extended from the ceiling to about 3.5 feet from the floor.

One TV2 pressure sensor measures the pressure differential between the outside area and the ante-room. The second pressure sensor measures the pressure differential between the ante-room and the clean room. The temperature/RH (Relative Humidity) of the working area was also monitored. All three sensors were mounted above the drop down ceiling with velcro an wired back to the monitor that is mounted on the wall by the door into the gowning area.

Each pressure sensor’s input tubes were connected to a plastic static pressure port mounted to a wall snub.

The entire installation process took one hour and one keyhole saw, which was used to poke a couple of holes in ceiling tiles and through the drywall where the Quick check monitor was mounted.

After the four pieces, the monitor and three sensors were in place and the wires run above the drop down ceiling, each sensor was plugged into the monitor. The monitor automatically recognized each sensor and asked how often we wanted to log it’s data. We then set a high and low alarm for each sensor and we were done. It was quick and easy. The TV2 Room Monitor immediately displayed the current conditions so the pharmacist can see if conditions are safe anytime she enters the room.

The QuickCheck Touchscreen display showed the two pressures were two low with a red font until the fans were turned on and the doors closed, at which time they turned green showing that they were above 0.015″ of water.

Continue Testing of our Pressure Sensor

In our efforts to continue to test and characterize our cleanroom pressure sensor we built a miniature cleanroom out of a cardboard box and an old computer fan. To improve the ability of this home-made, leaky chamber we sealed the entire box in plastic tape and punched a very tiny hole in the top of the box. These addons certainly did not make the box clean but it did make it possible to create a small positive pressure in the box, which we dubbed “test-chamber A”. The A is for amateur- thrown-together in an hour.

When we powered the fan we were able to generate a positive pressure of between 0.023 and 0.041″ of water. Our Cleanroom pressure sensor, which we installed with a passive wall plate, was able to correctly display and log the readings over several days. It responded immediately to changes in the pressure when the fan was turned off, going to 0.000″ within about 20 seconds. Once the fan was turned by on the pressure built up to the expected 0.030″ within a minute.

One thing we noticed was that the pressure bounced back and forth a bit reflecting the changes in pressure as air escaped through not only the pin hole in the top of the box but also through the fan itself. This very much reflects what happens in a normal sized clean room. The only way to stop the fluctuation would have been to cover the fan and the pin hole once the pressure had built up. Assuming the box was completely sealed the pressure would have stabilized at some value. Actual cleanroom pressures bounce around a bit also as air escapes through door frames, around fan enclosures and other minute openings. This is normal and is reflected in the pressures displayed on the QuickCheck monitor. It is possible to buffer the pressure a bit by averaging the pressures, which is allowed by the 2di CleanRoom monitor. The average setting can be changed on the sensor setup menu to fast, medium or slow. Setting the averaging to medium or slow would cause the displayed pressure to be a little more stable. However, bear in mind that we are measuring very small pressures, down to thousands of an inch, so any small change in the environment will cause a change in pressure

Step two was to test the QuickCheck display, which we did by setting the alarm pressure to 0.010″.

QuickCheck display showing low pressure reading

. Once the fan was turned off the pressure reading turned red indicating that it had dropped below our alarm threshold. And after 10 minutes the alarm sounded, the screen flashed, and an email message was sent showing that the pressure had fallen below the safe threshold.

We did not hook the strobe up of this test but had it been in place the strobe would have begun flashing. The ten minute delay in the alarm was set in the alarm menu to eliminate false alarms which might occur if the door had been opened. (Not a likely scenario for our miniature cardboard box). This delay feature is very important for our customers who do not want to be texted every time someone opens the door causing a drop on room pressure.

Our very limited testing has verified that the 2di CleanRoom pressure sensor can pick up very small changes in pressure and responds in every way expected.